The following are exerpts of a conversation between Gordon Waite and others with Henry Sonntag, who has questions about the fine grinding of his 8-inch mirror. Gordon describes how radius of curvature (ROC) changes are related to grit size and mirror position (top or bottom). Bob May, Herb Johnson, and Michael Lindner offer additional advice. Henry encounters problems with scratching and edge chipping, and these gentlemen provide their analysis. The discussion was posted in two threads on the STAR astronomy Web page in the ATM discussion page during mid-Sept 2006.
Following that is a discussion between Gordon and Herb Johnson about the "keys" to fine grinding, with an aggressive example of it by Gordon on a 20-inch mirror!
For my fine-grinding working notes, see see my "myglass" Web page on my 8-inch mirror. This Web page was last updated Sept 26 2006.
Henry Sonntag: At the last Monday night [ATM] meeting I was fine grinding (25 micron) an 8-inch mirror to remove a turned up edge. I over did it and now have a turned down edge. Gordon suggested I continue with the normal COC 1/3 stroke mirror on top to bring it spherical. However, the mirror ROC is getting short (about 62.5 inches) when I want 64 inches. So can I also use this stroke with the tool on the top to lengthen the ROC and also bring the mirror spherical?
Gordon Waite: [First,] I want to make a [general] comment about "turned up edge" and "turned down edge." As it is classically used, TUE and TDE apply mainly to mirrors that have been polished out. And usually they are defects of the very far edge of the mirror. When a wider area at the edge is defective, it is generally called a "rolled zone" instead of TDE or TUE.
In your case, where you are grinding with 25-micron abrasive, we have measured the radius of the outside 1.5" of your mirror to be longer (by about 1/3 of an inch) than the inner parts of the mirror. [My] calling this a TDE is playing a little loose with ATM nomenclature. I apologize for doing that at our [ATM session].
[You] and I have been measuring the surface of [the] mirror on my Strasbaugh digital spherometer. It reads out the radius directly on the display, and spits out four digits past the decimal point for the radius. The actual accuracy of the spherometer depends on the size of the test plate, of course, but I can measure with anything from a 5/8" diameter plate up to the big 16" diameter plate. So we can measure the radius to whatever accuracy the surface finish allows during fine grinding.
I wouldn't take any strong action on the mirror at this point. Henry, when we measured your mirror on Monday on my spherometer, the center of the mirror differed from the edge of the mirror by about .3" (radius, not sagitta) on the approximately 62.5" radius of curvature. The sagitta on 62.5" is .12800. The sagitta on 62.2" is .12862 inches. The difference is only .0006 inches, or 6/10,000 of an inch. You're grinding with 25-micron Microgrit, which has a particle size of about 98/10,000 inch (.00098"), or nearly 1/1,000 inch. So your "sphericity" problem is now smaller than the abrasive grain size! Also, the edge of your final paraboloid will end up having a radius about .1" longer than the center anyway, so the error isn't very harmful.
So in other words, you CANNOT make this mirror much more spherical using 25-micron abrasive. But you CAN lengthen the radius a little. If you want to do that, do some wets with the mirror on the bottom, and a 1/3 CoC stroke. That will move the radius longer, while keeping the mirror spherical.
Also, when you move down to 12-micron Microgrit, just keep the mirror on the bottom, and it will continue to lengthen in radius a little bit. You still have 12/5/3-micron grinding to go, and you can move the radius 1" or so during that time. Obviously it's less grinding to do it with 25-micron, if you really need to hit an accurate radius. - Gordon Waite
Bob May: Shorten up your stroke! There should be no ability to measure the difference in ROC with a [typical] spherometer, especially to 1/3" if you're doing the right length stroke. I usually get the fine grinding stroke to be about 1" total length with 1.5" being max. for an 8" mirror. Since you're short on the desired FL, put the mirror on the bottom and do some long strokes for a while and then shorten them up to get the glass back to spherical. [It] must be nice to have equipment like that [digital spherometer]! I'm just running along with a dial indicator reading to 0.0001" on a 4" diameter 3 point spherometer [base]. Nevertheless, when I read a disk with it, I don't see any movement on the needle with a properly ground surface.
Gordon: [Bob], thanks for your interest in Henry's project. I've always appreciated the input you've given me on my earlier projects! I just don't say "thanks" often enough to you.
Michael: BTW, the ROC gets shorter faster than it gets longer, so don't be discouraged if the ROC doesn't change much after some work.
Henry: Thank you all for the interest and enlightening comments. I'll do a couple of wets with 25 micron (MOB, 1/3 COC) and then continue with 12 micron, etc.
Following the above discussion, Henry discussed additional problems with fine grinding in another STAR ATM thread on Sept 19-20:
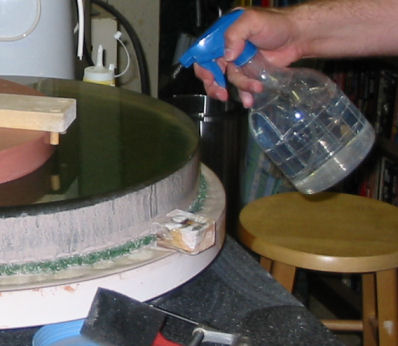
Henry: "Well, it's back to the scratches. I think I have the following problem. With the TOT (fine grinding with 25 or 12 microns) the edge dries out quickly. It takes about half way round the barrel. If a lot of friction is allowed to build up the edge of the mirror chips and results in scratches. With the MOT this is less likely to happen as the edge stays wet. The mirror edge shows chipping even though Gordon honed it last time we met. I can re-hone it at home and then try MOT with 25 micron to get out the scratches. What really bothers me is the chipping. The disk itself has a poor water cut surface that may make it prone to this type of problem."
Michael Lindner: Is the bevel gone on the blank (run your finger around the edge - it shouldn't be sharp)? You need some sort of bevel to stop chipping. If the bevel is good, I think the second most likely cause is putting the tool and mirror together or taking them apart. It takes surprisingly little effort to take a tiny chip off the edge.
Herb Johnson: Henry, I also had scratch problems as I went through 12, 5 and 3 micron fine grinding of my 8-inch mirror. I was going to post this in your previous thread on that subject, but it's more appropriate now. If you check my fine grinding work on my current mirror, you can see the errors I made as a rank beginner. It's hardly "here's what you should do", it's more "here's my problems", a look over my shoulder and at the advice I recieved from Gordon and Michael.
My experience was less with a chipping MIRROR EDGE - although I did get a single large chip - and more with apparently sharp corners of the tiles on the tool. As Gordon suggested in his previous "fine grinding" post, you have to consider the size of the grit. As the grit gets finer, the space between tool and mirror gets smaller and smaller. So any defect in a tile - be it a crack, or a corner, or an edge - will become signifigant as it raises that defect above the curved surface of each tile. Also, the gap between tiles become ENORMOUS at the micron scale and so the edges of the "valley of the tiles" are proportionally taller relative to the curve of the mirror.
(Gordon at my request noted later: "On a 3/4" piece of the mirror, the sagitta over that 3/4" length for a mirror with a 63" radius is .0011 inch. For the record, 25-micron Microgrit has a particle size of .00098 inches, so the sagitta and the particle size are a very close match, within about 12%."
Other effects which cause scratches include removing and placing the tool on the mirror. Again, the finer scale obliges more caution. I *think* that edge-zone scratches may suggest that kind of problem.
Keeping the mirror wet is always a good idea, but there is a balance between more glass removed with less water, versus the removed debris creating scratches because of the decreased gap between tool and mirror as water is removed. That "suction" also contributes to handling problems.
Of course, if you have chips on the edges of your mirror, they are self-evident and you need to bevel. A sharp glass edge is very fragile; I don't know if "friction" is an issue as much as pressure or stiction producing impulses of pressure. You have to bevel often, when you are grinding, as you are removing "a lot" of glass and so the edge is "sharpened". - Herb Johnson
Bob May: Kinda wondering what is happening over there where the air usually drips water on a regular basis. If your tile tool has the dental stone up to the tops of the tiles, you need to wet the dental stone a while before grinding. The stone will lap up water until it is pretty full and, until you get it fully wet, this will quickly dry out the wet with the subsequent scratch problem. Just dunk the tool in the water bucket for 15 minutes or so with an edge exposed before starting grinding. You also need to be careful when removing the mirror from the tool, sliding it off rather than lifting it off as the little bit of suction can build up a tremendous force on the edge of the mirror or tiles.
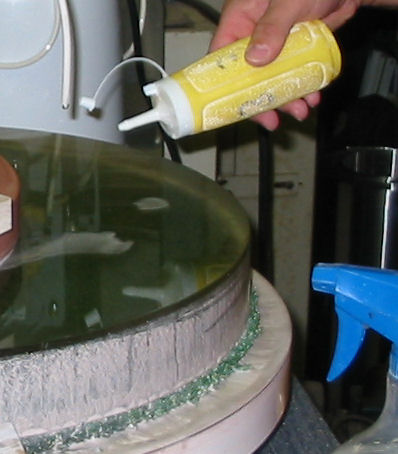
If you're running with exposed, glued on tiles, I'd suggest that you do your final grinding with the mirror on the bottom. This will tend to keep the water, as well as the grit, on the grinding surface. Remember that the only time that the grit is working for you is when it is between the mirror and tool. Large gaps in the tool surface make the grit slide off of that surface. I'll also note that if you don't use enough grit, the grit that is there will quickly break down and cause problems with the grinding action. Too much grit, on the other hand will tend to more make the mirror just roll over the surface of the tool.
After the next ATM session in late September, Henry's mirror was much improved.
After the above on-line discussion, Gordon and I corresponded offline about the issues of fine grinding, and how he deals with them. His example is some intense work on a 20-inch f/5 on his polishing machine, on a short schedule and a long night! - Herb
Gordon Waite: ["Herb, in my opinion the key to things is in] how you handle the glass. My shop is filthy, I have jagged edges hanging off my tools, I work very fast, I don't work a grit size as long as most people, I change grit levels without cleanup, I go down through both 5-micron and 3-micron fine grinding, yadda yadda yadda. And yet I very seldom get any scratches, and never any major ones. But I'm REALLY careful about how I put a tool down on glass, and how I pull a lap off the glass. And I'm really careful not to hang the top piece out too far over the bottom piece. And I'm careful not to carry anything around the shop at a higher level than the tops of my grinding machines. Those simple rules seem to eliminate almost all scratches."
"So basically, I don't try to "over-think" the problem. Everybody has to pay their dues and grind out a scratch or three. That work makes you more aware of good technique, and keeps you careful where it's import[ant] to be careful!" - Gordon Waite
Herb responds:"Gordon, while your shop is not "sterile" you follow many good rules of practice. You don't touch stuff on the floor or put stuff there. You use the best, well-graded grits. You are not afraid to keep things wet, which as you pointed out is contrary to Henry's work. In short, you CONTROL for contamination and grit such that any "mess" or residue will not impact your work. As you've explained to me, you decided that time and money is better spent in good methods, than in excessive clean-up and hoarding of grit and water."
"Of these, it's the handling that is the most difficult method to acquire; the rest are simple rules and habits. Gordon, this is the "craft" part of mirror-making, which is difficult to teach because it's intangible or at least non-verbal. Even so, you've laid out or implied fundamental rules above which make a difference, especially for the rank beginner."
"I'll remind you that many other beginners, including myself, find it very difficult to work at 12, 5, 3 micron with "hard" tools. Your skills trump those difficulties. "Paying their dues" is a way of saying that some methods require additional practice, physical ability (strength and dexterity in particular), attention to process, and quality materials. I'll also remind you that Michael, a skilled ATMer, does not advocate going below 12 micron; others of skill share his opinion."
Finally, I'll remind you that beginners find new ways to screw up, and in doing so show the consequences of the old ways to screw up as well. It's always been my contention that there is not enough literature out there on the consequences of screwing up. Why not learn from other's mistakes? That's why I put all my results, good and bad and mostly the latter, on my Web site." - Herb Johnson
Gordon: You know, [Herb, our] entire conversation really hit me last night. I have a contract to produce a 20" f/5 mirror for a client. The [pregenerated] blank I ordered from Newport [Glass] came in WAY late, and I have an incredibly short window in which to finish the piece. So last night I pulled an all-nighter to get ahead on the project a little. I was thinking about you around 5am this morning when I was sitting on a stool, looking at the spinning piece in front of me.
The blank arrived on Monday night. I trotted down to the shop and did a full set of measurements on the blank (ruler, scale and spherometer) and fabricated a 16.5" tile/plaster tool. Then I went home.
On Tuesday I worked on getting the high-speed grinding machine ready for this run. I made an "AstroTurf" mat to cushion the mirror. I had to modify the turntable to accept a mirror of this size. And I had to fabricate hold-downs.
On this 20" mirror, the tile/plaster tool I'm using is 16.5" in diameter, and 1.25" thick. It is made from standard [ceramic bath & kitchen] tile mats, just like every other tool we've made in the shop. [For reference,] on a 3/4" tile with a 201" radius [of curvature mirror], the sagitta across each tile is .00035".
Later in the afternoon I started in with some #180 SiC abrasive to spherize the mirror and work the radius down to the specified value. My strategy was to work the mirror in roughly 20- to 30-minute sessions. After each session I just cleaned off the top of the mirror and left it on the grinding machine. There I would use the spherometer to check the radius and sphericity, and generally inspect the surface to see if the generation marks were gone, and to watch the progress of a tiny chip on the edge. When I hit the target radius I called it a day, as I had things to do that night.
I went back into the shop on Wednesday afternoon around 2:30 and decided that I wouldn't leave until I had finished fine grinding the mirror and it was ready for polishing. (Although I did go home for dinner, I went back [to the shop] for the late-night part of this!) My strategy continued as before. As each session was completed, I just left the mirror (face up, of course) on the turntable, then cleaned it off with a sponge and Bounty towels and then did whatever testing and observations I needed to do.
And so I worked down through the grades, doing #280, then 25-micron abrasive. For both #280 and 25-micron, I did sessions of about an hour each. After 25-micron I lifted the tile tool off the mirror and did a very good set of spherometer measurements, taking nine sets of readings each on the center, 50% zone and edge. When I reduced the data, the radius on all three zones was exactly identical, to two or three decimal places! So the mirror was spherical, and the radius was within tolerances.
At this point, I knew that I wouldn't have to inspect the surface again until the mirror was ready to polish. So I squirted on the 12-micron, slapped the tile tool back in place and turned on the machine. I let the 12-micron run for an hour, and when it was finished, I just flooded the mirror with water--with the tool spinning as the machine was running--and when the water came up fairly clear I just started squirting on 5-micron instead of 12. After about five minutes, I flooded the mirror with water again and then continued on with the 5-micron.
After an hour on 5-micron, I played the "flooding" trick again and switched over to 3-micron, once again doing it without stopping the turntable or the overarm.
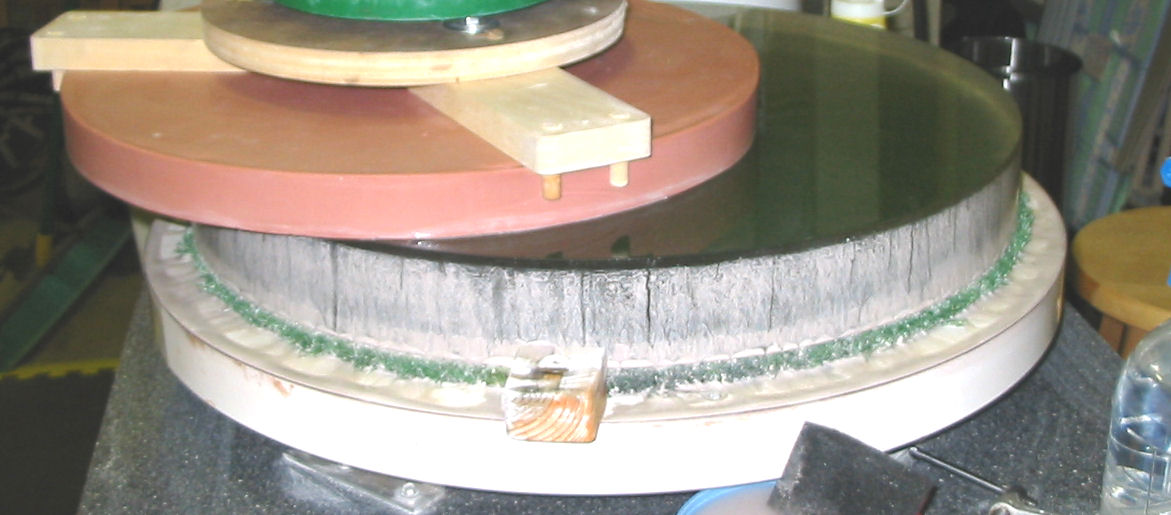
So now it's 5am and I'm sitting on the stool looking at the mirror and tool spinning away in front of me. And that's when I thought of you and this conversation about fine grinding and scratches and Henry's [difficulties]. The mess in front of me was a veritable ATM nightmare. (The linked photo is a less messy mirror. - Herb) The mirror is spinning around at 30 rpm's. There's a hard tile tool [of pink dental plaster] spinning around on top with 3-micron abrasive flying out of the interface, where the edge of the mirror is moving at over 30 inches per second. There's white abrasive of all flavors crusting up the edges of the mirror. Under the mirror is a green [AstroTurf] mat that is totally filthy and embedded with black SiC all the way up to #180. The tool wasn't washed since 25-micron, and the mirror hadn't even been lifted up off the turntable since I put it down to start with the #180. (Note: these photos again are of a later mirror: similar work but cleaner! - Herb)
I ran out of 3-micron in the squirt bottle after 50 minutes of grinding time, and decided to call it a night. I flooded with water, turned everything off, and lifted up the tile tool. Three Bounty [paper] towels and a few squirts of water later, I'm looking at a perfect 20" mirror, ready to hit the pitch. And not a scratch in site.
Now, I don't know how many classic ATM rules I broke here. I ground 3-micron for 50 minutes with a mirror sitting on a mat with 5 or 6 ounces of #180 grit just 2-1/4" away from the optical face. The 25-micron Microgrit encrusted on the edge was a scant few millimeters away! I wore the same shirt from #280 all the way through 3-micron, ignoring warnings to change my clothes after every grit level!
[As for the tool:] Out of the approximately 150 tiles on the tool, there is only one, maybe two, that came out low. All the rest are fine. Since I only had to start with 180 grit--and the tool only got about 7 hours of actual use, many of the tiles aren't fully in contact with the mirror. This makes no difference, of course.
So I got away with everything and took a 20" [precurved] blank from shipping box to 3-micron in a day and a half of work. No scratches. Just a hair-raising technique that works for me, and horrifies anybody that happens to drop in to watch!
Actually, I was pushing the envelope here. I wouldn't have tried the continuous technique (leaving the mirror on the turntable) if I hadn't used the underlying AstroTurf mat. I'm hoping that was my insurance against a terrible case of astigmatism. Of course, I won't know that until I've invested a lot of polishing time, and then put the piece up under the Foucault test. But you still have to try new things, so here I am! [Actually I'm pretty confident I don't have any 'stig, as the spherometer says the surface is perfect all around. It's a pretty sensitive spherometer!]
Gee, it looks like I've written chapter six of "Radically Stupid Mirror Making, Vol I" here! I guess I'll know in a couple of days how this all turns out. But at least I already know that I didn't get any scratches! One small victory, at least...Gordon
Herb Johnson
Contact information:
Copyright © 2006 Herb Johnson